tyler540
New member
ok guys my original intent was to do i highly detailed step by step of how i am doings things... But instead of making the install seem straight forward and exactly the same everytime, im just going to let the pictures do the talking...
here goes:
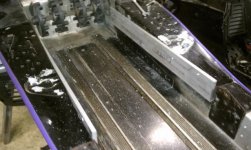
you can see in picture 5 we ran a wire thru the new front holes so we could measure easier.... also i should note we drilled all of the holes 3/16ths and then went back and drilled them bigger.... this was to lessen the margin of error when measuring center to center
here goes:
you can see in picture 5 we ran a wire thru the new front holes so we could measure easier.... also i should note we drilled all of the holes 3/16ths and then went back and drilled them bigger.... this was to lessen the margin of error when measuring center to center
Attachments
-
 IMAG0087.jpg37.5 KB · Views: 185
 -
 IMAG0088.jpg36.4 KB · Views: 184
 -
 IMAG0090.jpg40.6 KB · Views: 184
 -
 IMAG0091.jpg48.1 KB · Views: 183
 -
 IMAG0096.jpg45.4 KB · Views: 181
 -
 IMAG0097.jpg39.1 KB · Views: 182
 -
 IMAG0100.jpg37.4 KB · Views: 181
 -
 IMAG0101.jpg43.6 KB · Views: 184
 -
 IMAG0098.jpg33 KB · Views: 183
Last edited: